Maple Alps

summer dessert

Vegan New York Style Cheesecake

RecipesAmanda Walter | Maple Alps1 Comment

I definitely have a thing for cheesecake. It started way back in high school, and never really went away. In fact, a few of my friends and I have a tradition that whenever we’re together, we eat cheesecake. While it’s sad I don’t see them often, maybe it’s a positive thing.

Since I quit dairy, it was hard to find a substitute for the decadent dessert. Somehow, even though they’re tasty, the frozen varieties never really hit the spot.

This cheesecake, however, does it for me. And it’s husband approved - which is huge, considering he is even more of a cheesecake fan than I am!

Vegan New York Style Cheesecake | www.maplealps.com

The base of this cheesecake is cashews and vegan cream cheese (I’m sorry, nut sensitive friends!). I’ve also tried it with silken tofu, but somehow I like the texture the cream cheese gets. The arrowroot powder adds to the firmness of the cake. You also are in control of how tart you want it. I’ve tested this particular recipe with both as little as 3 TBSP of lemon juice and as much as a 1/4 cup of the liquid lip pucker.

I chose not to put the strawberries on top of the entire cheesecake, as we have a non-fan of the fruit living under the roof. Considering there is only one other human living in our house besides me, I’ll let you guess who that could possibly be.

You could make any type of fruit topping. In fact, get creative! And then let me know what combinations you like best! I’ve made strawberry and blueberry so far. I can’t wait to experiment with more flavors (and I’ve even made a galactic version of this for a space-themed birthday party which was a hit.

This is seriously the best basic cheesecake.

Vegan New York Style Cheesecake | www.maplealps.com

Vegan New York Style Cheesecake

For the Crust:

  • 2 cups graham crackers

  • ¾ cup melted coconut oil or vegan butter

  • ¼ cup maple syrup or agave

  • Pinch sea salt

For the Filling:

  • 8oz vegan cream cheese (I used Tofutti brand)

  • 1 cup refrigerated coconut cream

  • 1 cup raw cashews, soaked in hot water for 30 minutes

  • 1 tbsp arrowroot powder (get it from Amazon here)

  • ¼ c fresh lemon juice

  • ¼ c Maple syrup

  • 1 tsp Vanilla extract

  • Pinch salt

For the Strawberry Topping:

  • 1 container (16 oz) of fresh strawberries, diced and a few just halved

  • cane sugar

  • lemon juice

  • 1 tbsp arrowroot powder mixed in 2 tbsp water

what to do:

1) Preheat the oven to 350ºF

2) Prepare the crust by combining all the the ingredients in a bowl. Mix well and then press into the pie pan.

3) Bake the crust for 8 minutes, until browned. Set aside to cool.

4) While the crust cools, combine all of the filing ingredients into a high speed blender or food processor. Blend until a smooth mixture with no cashew chunks, scraping down the sides as deeded.

5) Pour mixture into cooled pie crust and smooth the top with a spatula.

6) Bake 40 minutes - top will be slightly browned.

7) Allow to cool completely.

8) While cake is cooling, make your fruit topping.

9) Make topping by adding the diced strawberries, sugar, and lemon juice into a small saucepan and bring to a simmer. Simmer for 10 minutes - the strawberries will break down. Make the arrowroot powder slurry and add it to the saucepan. Stir until the sauce is thickened. Add the halved strawberries and toss to coat. Cool before serving over the cheesecake.


Do you like cheesecake? What is your favorite topping? Let me know below!

Trying this recipe? Don’t forget to tag #MapleAlps so we can see what you’re up to! :)


Vegan New York Style Cheesecake | www.maplealps.com

Mango Swirl Ice Cream (vegan)

RecipesAmanda Walter | Maple Alps4 Comments

Going for ice cream is one of those iconic things about Summer break. Strolling down the street with your little cone or sitting and enjoying some company and views is part of what Summer brings. Thankfully, there are more and more dairy-free options being offered, but depending on where you are, they can be hard to find - and expensive when you do find them.

Thankfully, I don’t have to go out to enjoy a delicious cone of ice cream, and I don’t have to spend $5 or more on a pint in the grocery store. I can just make it in my kitchen. It does require some planning and waiting, but it is all worth it in the end!

Affiliate links are used in this post.

Mango Swirl Ice Cream (vegan) | www.maplealps.com

Earlier this summer I shared my chocolate chai ice cream recipe, but today I have something fruity for you for when you want to use your fresh produce (or even the frozen stuff in your freezer). 

I decided on mango because who doesn't love a good juicy mango? I could seriously eat mangos all summer long and never et tired of them. In fact, I do! :)

Yes, you will need an ice cream maker for this recipe. I'm hoping to add some churn-free ice creams to my index in the future. The good news is that you can get a relatively inexpensive ice cream maker and it will work beautifully. Mine is a simple one with a base that freezes and an electronic churn and I love it! Only paid $30 for it brand new a few years ago (check out Amazon for one).

Mango Swirl Ice Cream (vegan) | www.maplealps.com

The swirl is the most fun part of this whole thing. Half of the swirl mixture is added to the end to make the effect - and adds more fun fruity flavour!

My husband's eyes opened very wide in delight when he tasted this, so I counted this recipe a success.

Mango Swirl Ice Cream (vegan) | www.maplealps.com

Mango Swirl Ice Cream


What you need:

For the Mango Swirl:

  • 2 cups mango'

  • 2 TBSP organic cane sugar

For the Cream Base:

  • 2 cans full fat coconut milk

  • 2 TBSP arrowroot powder

  • 2 tsp vanilla extract

  • 4 TBSP maple syrup

  • 1/4 tsp sea salt


What to do:

  1. Mix all of the ice cream ingredients (to avoid clumps, you can do this in a blender, or dissolve the arrowroot powder into a small, separate amount of coconut milk) into a small pot on medium heat. Do no let it boil, but allow it to cook and thicken - about 5-8 minutes or so.

  2. Cool and then chill in the fridge for at least 5 hours.

  3. While the cream base chills, make the swirl by adding the mango and cane sugar to a small pot. Cook on low heat and constantly stir as the fruit softens.

  4. Once the fruit no can no longer maintain its shape, use an immersion blender to puree it until it becomes a thick sauce (feel free to leave chunks if that is your cup of tea). Set aside and allow to cool.

  5. Once completely chilled, put the mixture into your ice cream maker. Churn according to manufacturer's directions.

  6. As the mixture becomes thicker, like soft serve, start to slowly pour in about half of the mixture.

  7. Ladle the finished ice cream into a container. Scoop the rest of the mango swirl in three sections along the top and use a bread knife to swirl it in.

  8. Freeze a few more hours and then scoop and enjoy! 


Do you have an ice cream churn to enjoy during the Summer?


Mango Swirl Ice Cream (vegan) | www.maplealps.com

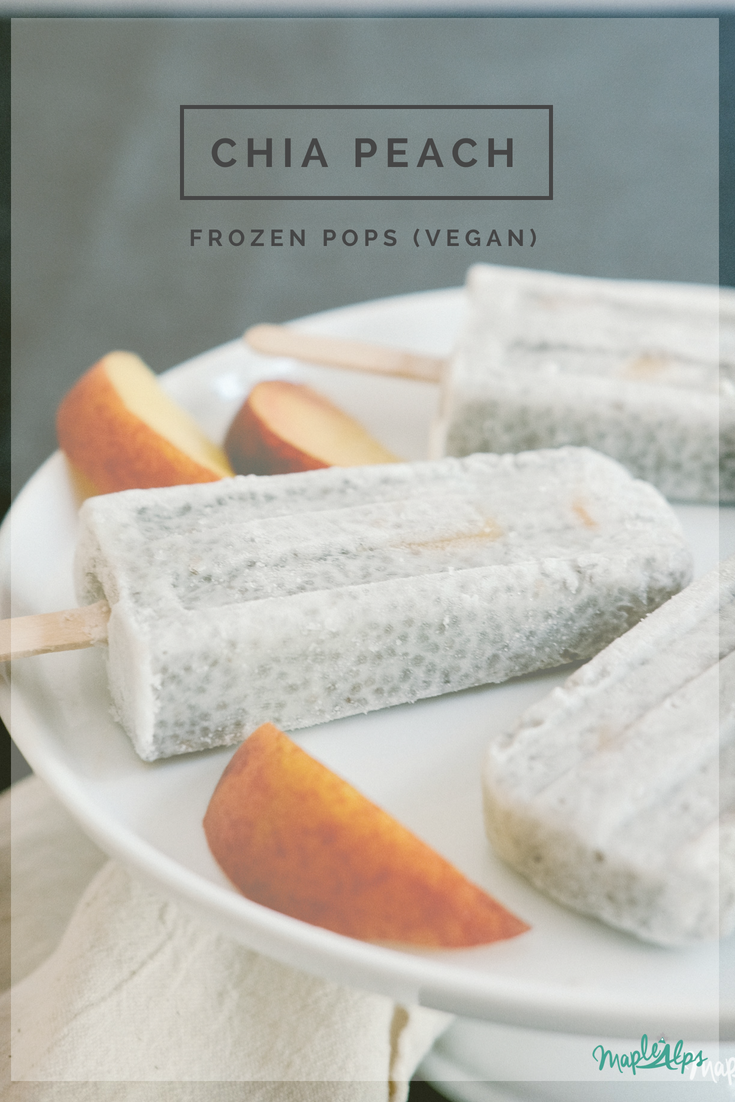
Chia Peach Frozen Pops (vegan)

RecipesAmanda Walter | Maple Alps23 Comments

Since moving to Michigan, I've appreciated Summer that much more. It seems that the Winter months drag on and on and on and Spring and Summer bring a breath of fresh air. I find myself physically aching for warm weather near the end of a cold spell and longing for warm evenings on the porch or at the beach.

I need to go outside and embrace my Summer! School will be starting before I know it, and soon the Winter will be back, so I need to get my outdoor time in now. I've been enjoying walking, jogging or riding bikes to the lake and walking along the shore. I also love just laying in the backyard or sitting on the porch - the grass is so soft and the sun makes me so happy!

Before I leave though, I'll give you this recipe to help you stay cool.

This post contains affiliate links.

Chia Peach Frozen Pops (vegan) | www.maplealps.com

You all know by now that I like chocolate, and while I have made chocolate versions of these frozen pops (ummm, chocolate peanutbutter chia please!!) and even fudgiscles, I decided to share a non-chocolate frozen treat with you today! I got the inspiration from a smoothie, really, and thought that fruit chunks in a popsicle would be a fun idea. Besides, it makes them prettier in my opinion.

Of course, you can use any kind of fruit in your pops. I chose peaches, because peaches. I love peaches. But I could imagine using raspberries or blueberries, or anything, really!

Chia Peach Frozen Pops (vegan) | www.maplealps.com

Waiting for these babies to freeze is a true test of patience, but they are well worth the wait!

Chia Peach Frozen Pops (vegan) | www.maplealps.com

Chia Peach Frozen Pops

1 ¼ cup coconut milk

½ cup soy

¼ cup chia seeds

½ - 1 TBSP cane sugar (depending on how sweet you want it)

Canned or fresh peach (or any other fruit, really!)


1. Whisk all ingredients except peaches together in a small bowl

2. Let mixture sit for 15-30 minutes, until it has become thick

3. Spoon a bit of the mixture into each popsicle mold.

4. Add fruit as you wish, alternating between the mixture and the fruit

5. Freeze 6 hours, until frozen.

6. To remove, run mold under hot water for 10-15 seconds and pull out carefully. To store, I wrap the pops in parchment paper (separately) and keep them in a freezer bag. You could also get really fancy and grab these plastic sleeves for frozen treats. 


For these treats you may need:


What do you like doing in the Summer months?


Chia Peach Frozen Pops (vegan) | www.maplealps.com

Chocolate Chai Ice Cream (vegan + gluten free + nut free)

RecipesAmanda Walter | Maple Alps18 Comments

Summer is here and I fully intend on enjoying every last second of it! The problem, however, is that summer only lasts a few weeks before Autumn comes creeping along and I have to break out the coats again. I do love the Fall, but I have been waiting and my body has been aching for sunshine that comes right now. The Winter was so long. So, so long. Thankfully, one can still eat ice cream in the Winter. It's just that it can be enjoyed outside in the Summer. 

Chocolate Chai Ice Cream (vegan + gluten free + nut free) | www.maplealps.com

The other day, I decided to break out my ice cream maker. You have to understand that I bought it years ago on a whim because it was a good deal. Since getting it, however, I have used it probably a grand total of….thrice. I was never able to achieve the creamy goodness that comes from the store, so I gave up. And then I had no time to experiment. And then it was in our basement still in the box. So yes, it was really time to either use it or lose it. I decided to try my hand at homemade ice cream again. I tried and tried some more until I finally came up with what I’m sharing with you today: a tasty chocolate chai ice cream.

The best part is that there is no dairy in it! I do love ice cream, but the dairy stuff makes me ill.

Chocolate Chai Ice Cream (vegan + gluten free) | www.maplealps.com

The base is a coconut cream and chai-infused soy milk mix that is pretty tasty if I do say so myself! It’s also creamy and has the right texture. Beyond that, it is inexpensive to make and will save you $5/pint of the dairy-free stuff at the store. You can’t get much better than that, really.

I wasn’t actually planning to make a chai-infused ice cream. I was just brainstorming flavours and I looked over and saw some loose tea that I had picked up a while back and it hit me:

chai + chocolate = seconds, please!

Chocolate Chai Ice Cream (vegan + gluten free) | www.maplealps.com

I already have a ton of ideas for future flavours, so stay tuned as I experiment and develop ice cream-making skills. 

Chocolate Chai Ice Cream (vegan + gluten free) | www.maplealps.com

Chocolate Chai Ice Cream (vegan + gluten free)

What you need:

  • 2 cups soy milk

  • 1 can (15 ounces) coconut cream

  • 1 TBSP chai tea (loose tea or 1-2 tea bags)

  • ⅓ cup arrowroot powder

  • ¼ tsp salt

  • ½ tsp vanilla

  • ¼ cup cocoa powder

  • 2-3 TBSP maple syrup or agave (depending on how sweet you want it)


What to do:

  1. Heat 2 cups of soy milk

  2. Steep the chai tea in the milk for 10-15 minutes, depending on how strong you want the chai flavour (I used a loose-leaf decaffeinated chai from Teavana)

  3. After the tea is done steeping, add it, along with the rest of the ingredients, to a high speed blender. Mix well until there are no clumps

  4. Add mixture to a large saucepan, and heat up slowly, continually stirring, until you have a pudding-like consistency.

  5. Completely cool the mixture (about 4 hours in the refrigerator)

  6. Put into ice cream maker and churn according to instructions

  7. Add ice cream to a shallow container and freeze for a few hours. It will stay creamy for a few days in the freezer- just let it sit out for a few minutes after the first day till it softens a bit!


Have you ever made your own ice cream?


Chocolate Chai Ice Cream (vegan + gluten free) | www.maplealps.com

Creamy Chocolate Ice Pops (vegan + gluten free fudgsicle copycat)

RecipesAmanda Walter | Maple Alps12 Comments

I remember when I was young, my grandparents owned and operated a convenience store in town. In the summer, they would let us have some treats from the freezer and I would always choose a chocolate popsicle. No, this was not a Fudgsicle, but rather a chocolate flavoured popsicle. I don't know if any of you have ever had one, but I loved them.

Then, one day, I did try a Fudgsicle, and I loved it. It was creamy and soft and had so much chocolate goodness - not the watery hardness of my former love. 

Trying to come up with replicating this delicious cold treat has proved quite the task, but I took a cue from my Chocolate Cream Pie and came up with something quite tasty!

This post contains affiliate links

Creamy Chocolate Ice Pops (vegan + gluten free fudgsicle copycat) | www.maplealps.com

Because of the added arrowroot powder, it helped make it much more creamy and gooey, which, in my humble opinion, is the best part about Fudgsicles. It feels just like eating an actual one - the texture is perfect.

Creamy Chocolate Ice Pops | www.maplealps.com

I had some issues getting these babies out of the mould, so they aren't the prettiest, but they sure are tasty!

The best thing about making cold treats is how easy it is to mix things up and come up with fun combinations. I added almond flavour to these pops to add a chocolate almond flavour (my fav!), but you can do whatever you want! I notice that I don't really taste the coconut from the coconut milk when I add flavouring, so I like to skip it sometimes and have a more coconut-chocolate flavour.

Creamy Chocolate Ice Pops

Creamy Chocolate Ice Pops

What you need:

  • 1 cup coconut milk (full fat works best)

  • ¾ cup unsweetend soy milk

  • ¼ cup cane sugar (or less, depending on how sweet you want it)

  • 1 TBSP arrowroot powder

  • 1 ½ TBSP cocoa powder

  • ½ tsp almond extract (if you don't like almond flavour, skip this ingredient, or substitute with vanilla or something fun!)


What to do:

1. In a saucepan, whisk together all ingredients, constantly stirring until thick to avoid clumps. 

2. Pour into popsicle mold (I use this one from Amazon) and freeze for at least 6 hours, or overnight.

3. To remove, run mold under hot water for 10-15 seconds and pull out carefully. To store, I wrap the pops in parchment paper (separately) and keep them in a freezer bag.


**Note: I like making these in small batches when I want to make other flavours as well. For a full tray, simply double the recipe!

 
Staying cool and refreshed is easier now than ever with these tasty vegan fudgsicles!
 
Creamy Vegan Chocolate Ice Pops | www.maplealps.com